March VPS Promotion: Get Up To 30% Off New Orders!
March VPS Promotion: Get Up To 30% Off New Orders!
You are already most likely familiar with the process to “redirect” drives from your host computer over to your remote desktop session. This is as simple as choosing your local resources in the settings of your RDP connect window. Notice below the More button at the bottom which takes you to the local devices and resources section which allows resources to be chosen.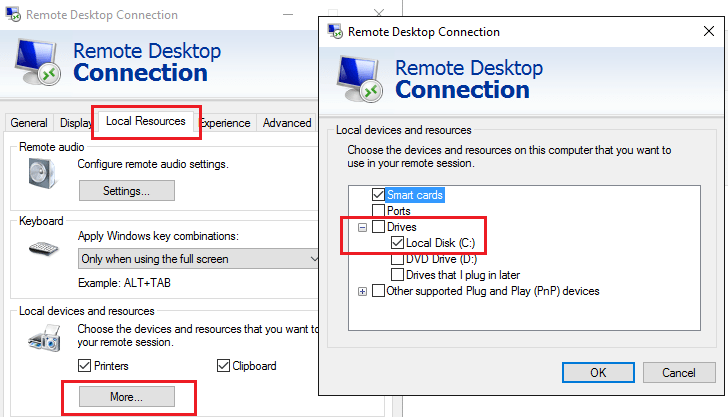
On your target remote desktop connection, you will see these redirected drives underneath your Devices and drives area of Explorer. They will be designated by <drive letter> on <computername> where computername is your host.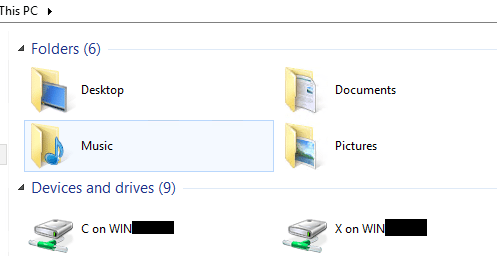
Mapping these to real network drives
You may however have the need to map these redirected drives to real drive letters inside your remote desktop session. For instance developers may have the need to have access to source code in a lab environment which they may not have RPC or NETBIOS traffic allowed. The traditional map network drivewouldn’t work as the ports required aren’t open.
The redirected drives however, can be mapped to which is awesome! If you run a simple net usecommand inside of your RDP session, you will see the redirected drives appear. Notice the format of the drive is in the form of a special UNC path represented by \\TSCLIENT\<drive letter> so these are mappable.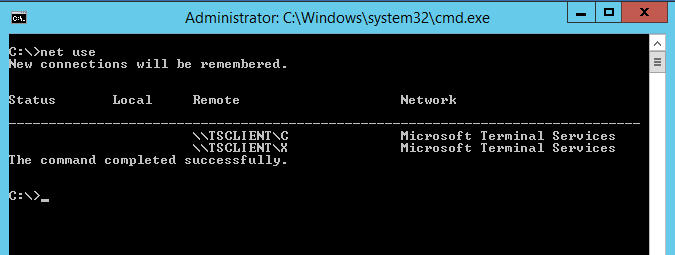
Notice that all we have to do to map these in a true sense to a network drive letter is a simple net use <drive letter> \\tsclient\<drive letter> and voila, the drive is mapped!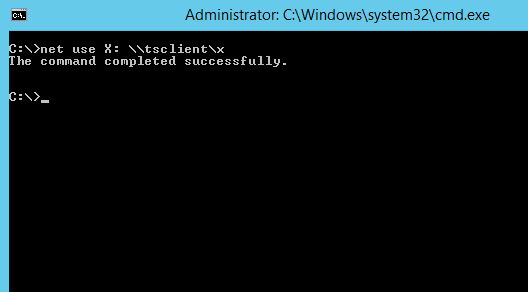
Now if you look in Windows explorer, you will see a true network drive mapped under your Network Locations section.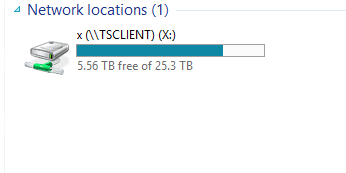
Final Thoughts
If you are in need of being able to map a network drive from remote desktop back to local computer for development or possibly application specific reasons, this process is definitely a life saver.
Caution: Trading involves the possibility of financial loss. Only trade with money that you are prepared to lose, you must recognize that for factors outside your control you may lose all of the money in your trading account. Many forex brokers also hold you liable for losses that exceed your trading capital. So you may stand to lose more money than is in your account. FXVPS.co does not guarantee the profitability of trades executed on its systems. We have no knowledge on the level of money you are trading with or the level of risk you are taking with each trade. You must make your own financial decisions, we take no responsibility for money made or lost as a result of using our servers or advice on forex related products on this website.